Today, we are going to do a quick write-up with a video on replacing a failed SAS 5 raid controller. This procedure is pretty much the same across the entire PowerEdge line of servers.
Firstly, shut down your server and open the case. Locate your SAS 5 raid controller and you will see something like Fig. 1.
Unscrew the card from your case, and squeeze the blue tabs on the side of the SAS cable, lifting it straight off the card. Next, lift the card out of the server and replace it with your new one.
Installation is much more in-depth in the video demonstration, but basically is the reverse of the removal.
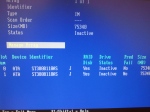
Now, when you turn your server back on, you will get a message stating your virtual disk is inactive/optimal. (Fig. 2)
We are going to go into the raid configuration utility by pressing “CTRL C” when prompted.
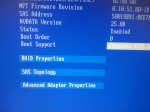
Once inside, press “enter” and arrow over to the “raid properties” menu (Fig. 3) and press enter. We are going to arrow down to “manage array” (Fig. 4) and press enter. Now arrow down to “activate array” and press enter.
This part of the procedure can be a bit scary because it is taking the existing mirror and bringing it down to a raid 0 and re-syncing it back to a mirror or raid 1. As soon as you activate the array again, you will see it re-syncing if you go back into “manage array” (Fig. 4) in the configuration utility. I have seen windows while booting come up with “NTLDR NOT FOUND” until the sync is 100% complete so do not panic.
Don’t forget to check out the video to this article and our video tutorials at our YouTube channel: velocity783. Have a How-To request? Request your own and we will get right to work on it for you!


