By Mike Kidd
As technology gets a little older, parts become increasingly hard to find and purchase. A true testament of this would be the redundant power supplies for the Dell Poweredge 1800 server. Even we are having a hard time getting a hold of these little guys. However, you are in luck! There is an alternative to redundant power supplies for the 1800, and this is the Non-redundant unit. So today I will be showing you how to change out your redundant unit with the Non. It may seem like a challenging job, but you will see that it is not that hard and does not take very long to complete, and hey, saving money is good too!
 |
| Removing Power Supply from Server |
Begin by powering down and unhooking everything from your server. Then, remove the 2 redundant power supplies from the tower. There will be little black tabs on the back of them (pictured left) that you need to “pinch” up, and pull down. The unit will pull out. Now, remove the bezel, tip your case on its side, and remove the side panel. The next step will be to remove the big black fan shroud from the case.
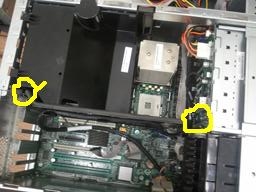 |
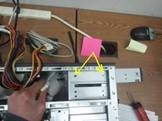
| Removing Black fan |
There are 2 tabs on the top of the shroud, closest to you (pictured right). Press them both down, while lifting the entire assembly upwards. But do not lift too far; there is still a power wire for the fan attached to the system board. Unhook that wire and set the shroud off to the side.
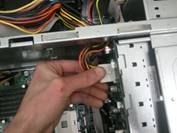
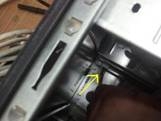
Now we can begin removing the power distribution board from the system. Unclip the connector from the back plane, and snake it through the chassis into the drive area out of the way. (See below, left)
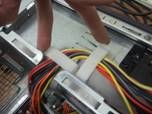
Next, unclip the 2 white plastic straps located on the power supply cage.
(See below, center)
 |
| Remove power distribution board |
 |
| Unclip straps on power supply cage |
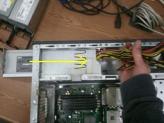
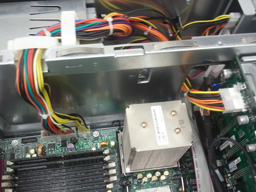
We can go ahead and unclip the main power connectors from the system board along with the ribbon cable, (See below, right) lift them out of the way for now.
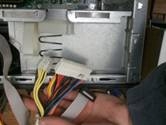 |
| Removing main power connectors from system board |
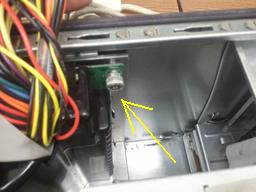
This next step can be a bit tricky, unhook the 4 pin powerwire as well as the IDE cable from the cd-rom drive. Now remove the 2 screws that hold the dive in place and push it forward (you can remove it if you like) to give access to the 4 pin power wire on the 3.5” floppy drive. Unclip that wire and pull the wires off to the side with the rest of them.
Here is a picture of the 4 pin wire for floppy drive below. Now it’s time to remove the power distribution board from the chassis. This is done by unscrewing the Phillips head at the top right of the board (pictured below).
 |
| Remove 4 pin wire cable |
 |
| 4 pin power wire for floppy |
Once loosened, lift up on the board, pull back slightly, and continue pulling up till the board is out. The install of the non-redundant unit is basically the reverse of the removal, except you don’t have the ribbon wire from the redundant unit. Bundle the wires closely together and fish them through the back of the unit while sliding the power supply into place.
 |
| Remove Power Distribution Board |
 |
| Bundle cables |
And then fasten the new unit to the back of the chassis as shown in the picture below, right:
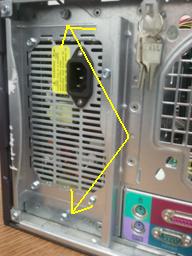 |
| Power Supply in PE1800 Case |
Once fastened, go through and run all the power connectors as they were with the power distribution board and it should look like the picture below, once finished. That is it!
 |
Cables reattached without power distribution board |
For a complete video How-to install, head over to http://youtu.be/7OV0DhScDc8 for this write-up and others. Don’t forget to check out our other videos at our YouTube channel: velocity783.
Have something you would like to know how to do? Or “will it work?” Then stop in to our website at: www.velocitytechsolutions.com in the video gallery and make a request!